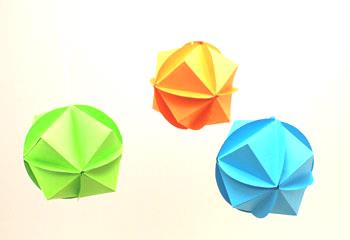
Easy Christmas Crafts: Pyramid Ball Ornament
The Pyramid Ball Ornament uses paper, yarn, scissors and glue along with the funEZcrafts pattern to become an inexpensive and unbreakable ornament during the holidays.
Let's make the orange one.
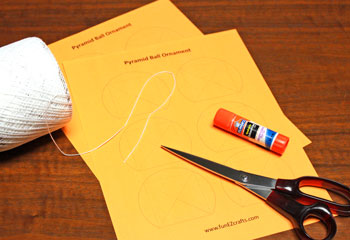
Easy Christmas Crafts: Pyramid Ball Ornament Materials and Tools:
Colored printer paper (20 to 24-pound)
Yarn
Scissors
Glue
Pattern - Pyramid Ball Ornament (click to open Adobe PDF)
Yarn
Scissors
Glue
Pattern - Pyramid Ball Ornament (click to open Adobe PDF)
Take a look at the simple materials and tools.
The Steps for How to Make the Easy Christmas Crafts: Open Sphere 3-D Ornament:
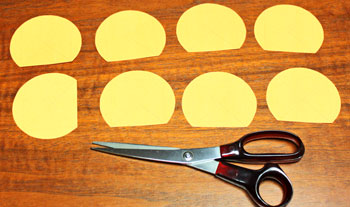
Print two copies of the Pyramid Ball Ornament pattern.
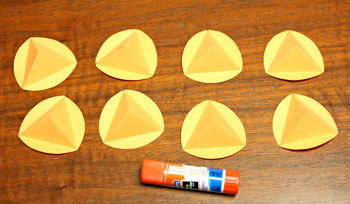
Cut out eight shapes.
You can make the balls with more of the shapes if you want bigger ornaments.
Cut out eight shapes.
You can make the balls with more of the shapes if you want bigger ornaments.
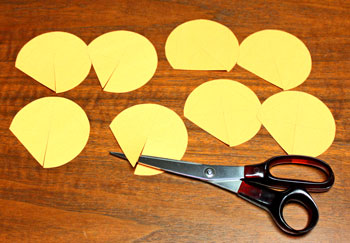
Cut along the solid gray line on the diagonal for each of the shapes.
Stop the cut at the halfway point where the line becomes dotted.
Stop the cut at the halfway point where the line becomes dotted.
Fold along each of the eight shapes along the dotted lines.
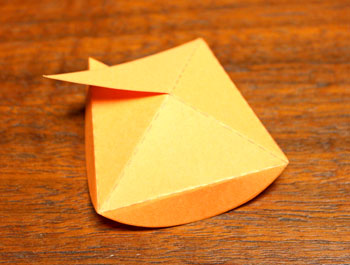
Reverse the folds of the pyramid to hide the gray lines inside.
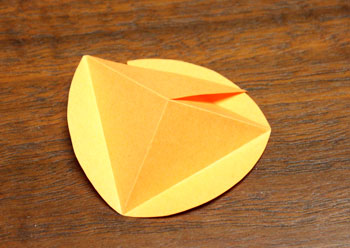
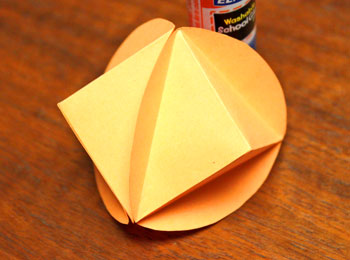
Overlap and glue the triangles to secure the pyramid shape.
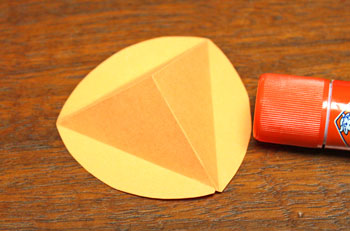
Continue folding and gluing the remaining shapes to make eight pyramids.
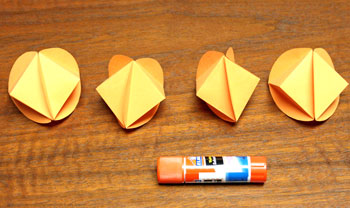
Place glue on one of the three arcs around one of the pyramid shapes.
Position an arc of a second pyramid over the glue matching the edges.
Position an arc of a second pyramid over the glue matching the edges.
Working in pairs, continue gluing one arc of one pyramid to one arc of another pyramid until the eight shapes become four shapes.
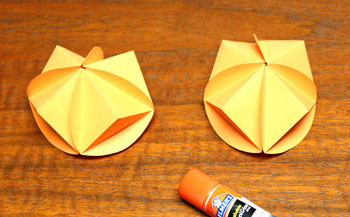
Place glue on two arcs of one of the two-pyramids shapes.
Match two arcs from a second two-pyramid shape over the glue.
Do this for the second pair of two-pyramid shapes.
The result is two shapes each with four pyramids.
Match two arcs from a second two-pyramid shape over the glue.
Do this for the second pair of two-pyramid shapes.
The result is two shapes each with four pyramids.
Cut a piece of yarn 8 to 10 inches long.
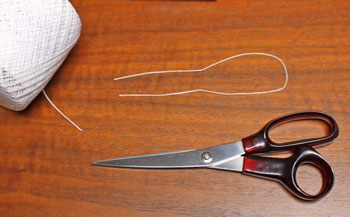
Fold the yarn in half.
Place glue on the two cut ends of yarn and position the ends inside one of the pyramids.
Place glue on the two cut ends of yarn and position the ends inside one of the pyramids.
Place glue on the four arcs of one of the four-pyramid shapes.
Position the second four-pyramid shape's arcs over the glue on the first shape's arcs.
Match the edges before the glue begins to set.
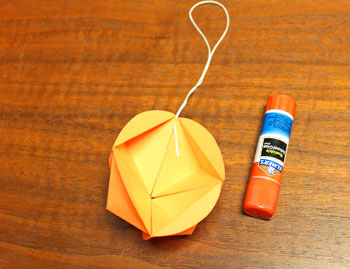
Make sure the yarn loop is outside of the pyramid ball ornament.
Position the second four-pyramid shape's arcs over the glue on the first shape's arcs.
Match the edges before the glue begins to set.
Make sure the yarn loop is outside of the pyramid ball ornament.
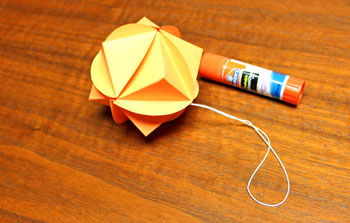
The Pyramid Ball Ornament is finished and ready to display.
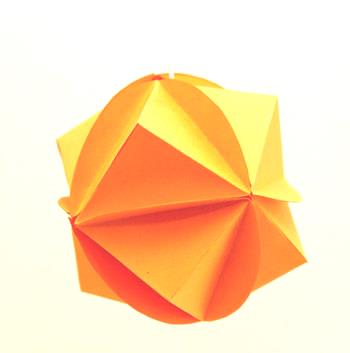
This ornament is light weight and unbreakable for those with curious fingers or paws in their home.
Make one or many and have fun!
The Pyramid Ball Ornament is a fun project for the younger or the older folks and can also be a teaching aid for children learning about shapes.
Make one or many and have fun!
The Pyramid Ball Ornament is a fun project for the younger or the older folks and can also be a teaching aid for children learning about shapes.


funEZcrafts
Welcome
Come on in and stay awhile...

funEZcrafts
Welcome
Come on in and stay awhile...