Easy Angel Crafts: Yo Yo Angel Ornament
This easy angel crafts Yo Yo Angel ornament uses scraps of fabric, some poster board for stability and some yarn.
She takes a little time to make, but she's a fun, easy and inexpensive project.
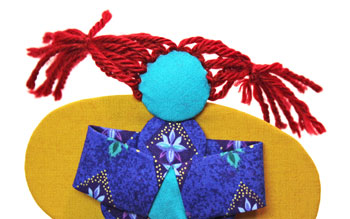
Take a look at this little angel with her fun red yarn hair and golden wings.
She takes a little time to make, but she's a fun, easy and inexpensive project.
Take a look at this little angel with her fun red yarn hair and golden wings.
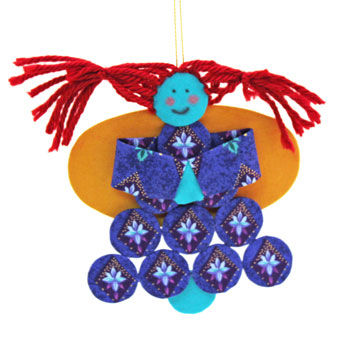
She's such a cute little yo yo angel.
She can decorate a tree, hang in an office or kitchen and even be a small gift for holiday guests to take home as a keepsake.
She can decorate a tree, hang in an office or kitchen and even be a small gift for holiday guests to take home as a keepsake.
Easy Angel Crafts: Yo Yo Angel Ornament Materials and Tools:
Easy Angel Crafts Yo Yo Angel Ornament pattern (click to open PDF file)
Scraps of fabric - three different colors, one for the body; one for the face, hands and feet; and one for the wings
Small amount of fiberfill - very small, can use part of a cotton ball or the ends of a few cotton swabs
Cardboard or chip board (I used inexpensive white poster board)
Yarn for hair (can also use thread, just add more stitches)
Yarn for hanging loop (I used gold lamé yarn.)
Thread
Needle
Yarn needle
Pins
Iron
Black and red pens (for facial features)
Powder blush or eye shadow for cheeks
Cotton swab to apply powder to cheeks
Scissors
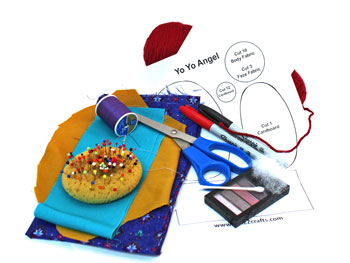
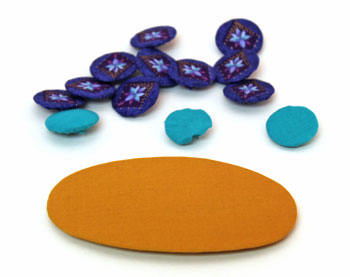
Take a look at the simple materials and tools shown here.
If you don't have scraps of fabric from other projects, you can use clothing that is being discarded.
If you don't have scraps of fabric from other projects, you can use clothing that is being discarded.
The Steps for How to Make the Easy Angel Crafts: Yo Yo Angel Ornament:
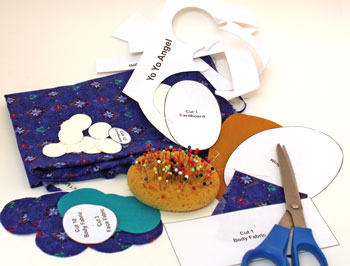
Print the Easy Angel Crafts Yo Yo Angel Ornament pattern.
Cut out each of the pattern pieces.
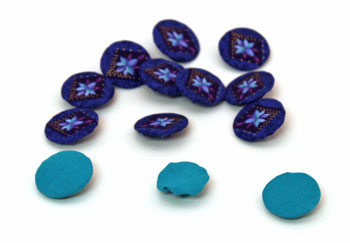
Cut the three different fabrics for the body, arms, face and wings as shown on the pattern pieces.
Cut the small circles and the elliptical shape for the wings from the poster board.
Cut out each of the pattern pieces.
Cut the three different fabrics for the body, arms, face and wings as shown on the pattern pieces.
Cut the small circles and the elliptical shape for the wings from the poster board.
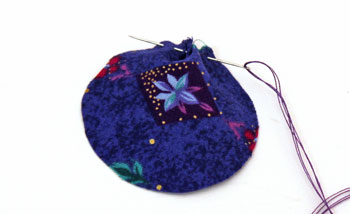
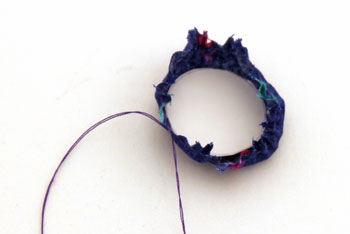
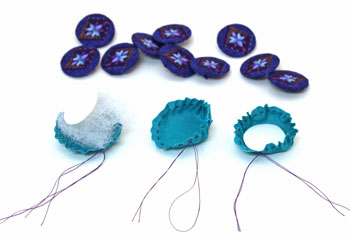
Thread the needle. Make small running stitches near the edge of the circle. (The free e-book of How to Sew Stitches helps with basic stitches.)
Leave a 2-inch tail of thread at the beginning of the stitches. This will be used to gather the resulting yo yo.
I suggest using a double thickness of thread. Otherwise, a single strand may break and the stitches have to be sewn again. (Been there, done that and learned the lesson the hard way.)
Leave a 2-inch tail of thread at the beginning of the stitches. This will be used to gather the resulting yo yo.
I suggest using a double thickness of thread. Otherwise, a single strand may break and the stitches have to be sewn again. (Been there, done that and learned the lesson the hard way.)
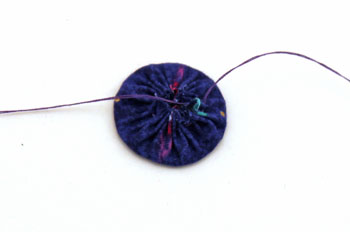
Pull the thread tails to partially close the circle.
Insert one of the small poster board circles inside the yo yo.
Insert one of the small poster board circles inside the yo yo.
Pull the thread tails firmly to close the yo yo around the poster board.
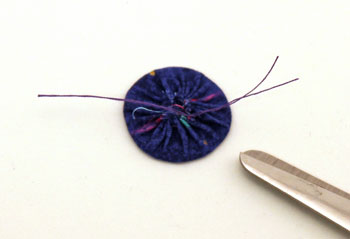
Hold the thread ends firmly. Tie the ends into a knot close to the fabric.
Hold the thread ends firmly. Tie the ends into a knot close to the fabric.
Trim the thread tails leaving roughly 1 1/2 inches of thread.
The extra thread helps prevent the knot from coming undone.
It also gives you enough thread to re-tie the knot if necessary.
The extra thread helps prevent the knot from coming undone.
It also gives you enough thread to re-tie the knot if necessary.
Push the thread tails inside the closed yo yo.
Use the closed point of the scissors to push the thread inside.
Use the closed point of the scissors to push the thread inside.
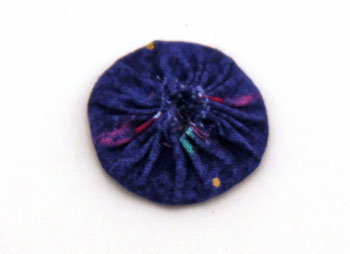
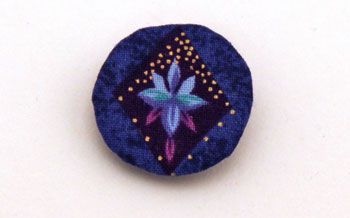
This shows the finished front of the first yo yo.
Nine more to go for the body of the Easy Angel Crafts Yo Yo Angel Ornament.
Nine more to go for the body of the Easy Angel Crafts Yo Yo Angel Ornament.
Next, prepare the face, hands and feet yo yos in the same manner.
But, they are a little different.
For the face, place a small amount of fiberfill under the poster board circle and pull the threads taut over the poster board.
For the hands, do not include a poster board circle.
For the feet, include a poster board circle just like the yo yos for the body.
But, they are a little different.
For the face, place a small amount of fiberfill under the poster board circle and pull the threads taut over the poster board.
For the hands, do not include a poster board circle.
For the feet, include a poster board circle just like the yo yos for the body.
The face is a gently rounded shape.
The hands are soft to fit easily into the angel's arms.
The feet are a sturdy round shape to be at the bottom of the angel.
The hands are soft to fit easily into the angel's arms.
The feet are a sturdy round shape to be at the bottom of the angel.
Sew around the elliptical shape. Gather the edge slightly and insert the elliptical poster board.
Pull the threads tightly. Tie the ends into a knot close to the fabric.
Trim the thread with thread tails. Hide the thread tails under the fabric.
Pull the threads tightly. Tie the ends into a knot close to the fabric.
Trim the thread with thread tails. Hide the thread tails under the fabric.
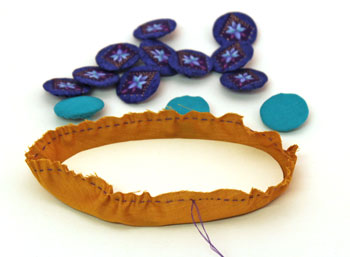
The front of the wings show a smooth surface.
Now, let's start putting the yo yo angel together.
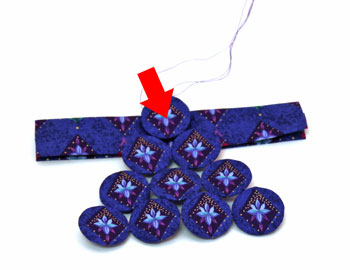
First, connect the body yo yos into rows of four, three, two and one.
Sew small stitches on the sides of the yo yos as shown by the red arrows. (Visit the Christmas Tree of Craft Yo Yos for more detailed pictures of how to connect the yo yos.)
First, connect the body yo yos into rows of four, three, two and one.
Sew small stitches on the sides of the yo yos as shown by the red arrows. (Visit the Christmas Tree of Craft Yo Yos for more detailed pictures of how to connect the yo yos.)
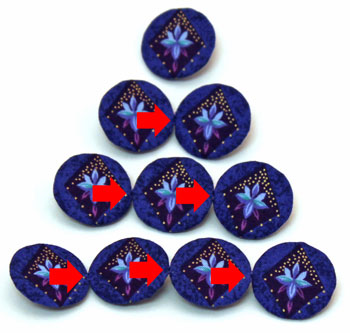
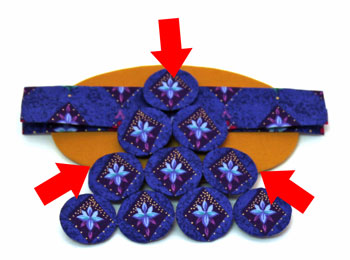
Connect the rows like stacking round objects.
Sew small stitches where the edges of the circles meet as shown by the red arrows.
Sew small stitches where the edges of the circles meet as shown by the red arrows.
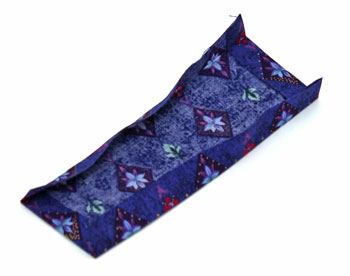
Next, let's make the arms.
Press 1/2 inch of fabric to the wrong side on all four sides of the rectangle of fabric.
Fold the fabric in half lengthwise and press.
Press 1/2 inch of fabric to the wrong side on all four sides of the rectangle of fabric.
Fold the fabric in half lengthwise and press.
Place the arms behind the body with the folded edge toward the top.
Attach with small stitches to the back of the top yo yo.
Attach with small stitches to the back of the top yo yo.
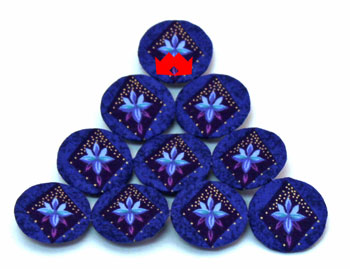
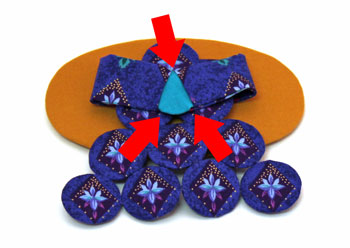
Now, place the wings behind the shape with the smooth side toward the front.
Attach the wings to the body with small hidden stitches at the three points shown by the red arrows.
Attach the wings to the body with small hidden stitches at the three points shown by the red arrows.
Fold the arms toward the front and insert the hands yo yo (the one without the poster board) into the open ends of the arms.
Sew small stitches to hold the top of the arms to the hands and to the top yo yo.
Sew small stitches at the bottom of the arms to hold the hands and arms to the next two body yo yos.
Sew small stitches to hold the top of the arms to the hands and to the top yo yo.
Sew small stitches at the bottom of the arms to hold the hands and arms to the next two body yo yos.
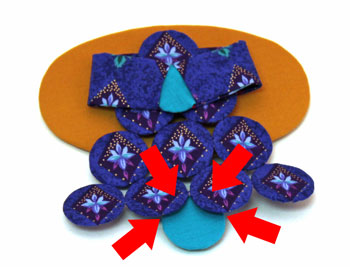
Add the feet (the yo yo with the poster board) to the bottom of the body shape behind the two middle yo yos.
Sew small stitches at the top and sides of the feet yo yo to the body yo yos.
Sew small stitches at the top and sides of the feet yo yo to the body yo yos.
Position the head overlapping the top body yo yo and the top of the wings.
Sew small hidden stitches along the bottom edge to the wings and the top body yo yo.
Sew small stitches across the back to connect the face yo yo to the top of the wings.
Sew small hidden stitches along the bottom edge to the wings and the top body yo yo.
Sew small stitches across the back to connect the face yo yo to the top of the wings.

Thread the yarn needle with yarn for the hair.
Begin with a stitch in the edge of the face yo yo just above the wing.
Begin with a stitch in the edge of the face yo yo just above the wing.
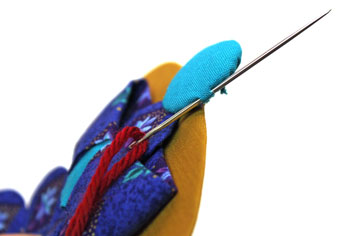
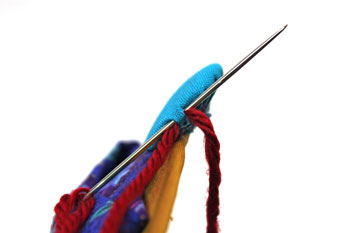
Pull the yarn through leaving roughly two inches of yarn as hair.
Stitch through the same holes again to lock the hair in place.
Clip the yarn at roughly two inches length.
Stitch through the same holes again to lock the hair in place.
Clip the yarn at roughly two inches length.
Add the next yarn stitch adjacent to the first.
Continue around the top of the face yo yo with the yarn stitches to the top of the wings on the opposite side.
Tie the yarn hair on each side of the face.
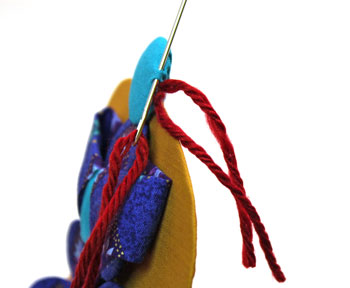
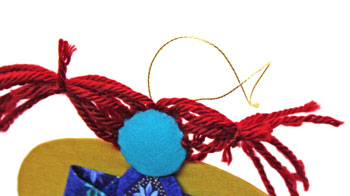
Add a yarn loop to the back of the face yo yo.
I thought the same yarn would look like she's hanging by her hair. I used a gold lamé yarn instead.
Sew a small stitch leaving roughly a five inch yarn tail.
Sew another small stitch over the first.
Pull the yarn through and tie the ends together at roughly four inches length.
I thought the same yarn would look like she's hanging by her hair. I used a gold lamé yarn instead.
Sew a small stitch leaving roughly a five inch yarn tail.
Sew another small stitch over the first.
Pull the yarn through and tie the ends together at roughly four inches length.
Add the facial features.
I used a black pen for the eyes and a red pen for the mouth. However, on the turquoise, the red turned almost black.
For the cheeks, I used the end of a cotton swab with pink powdered eye shadow.
I used a black pen for the eyes and a red pen for the mouth. However, on the turquoise, the red turned almost black.
For the cheeks, I used the end of a cotton swab with pink powdered eye shadow.

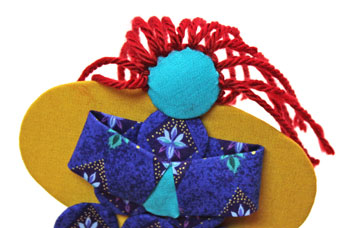
Here's the finished angel smiling over all she sees.
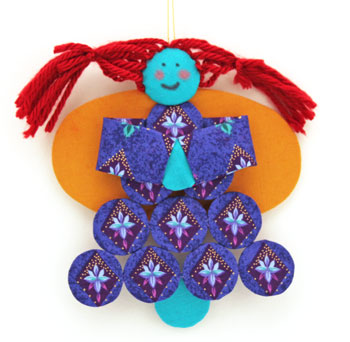
A few materials, basic tools, simple steps and some time makes this Easy Angel Crafts Yo Yo Angel Ornament a fun and easy project.
With different fabric scraps, a whole host of different angels can decorate your home.
Have fun making one or many!
The inexpensive and Easy Angel Crafts Yo Yo Angel Ornament can also be a great group project for a family, a craft party, a community center or an office team building exercise.
With different fabric scraps, a whole host of different angels can decorate your home.
Have fun making one or many!
The inexpensive and Easy Angel Crafts Yo Yo Angel Ornament can also be a great group project for a family, a craft party, a community center or an office team building exercise.


funEZcrafts
Welcome
Come on in and stay awhile...

funEZcrafts
Welcome
Come on in and stay awhile...