How To: Sew a Blanket Stitch
Check out our companion instructions for how to sew a blanket stitch overlay design.
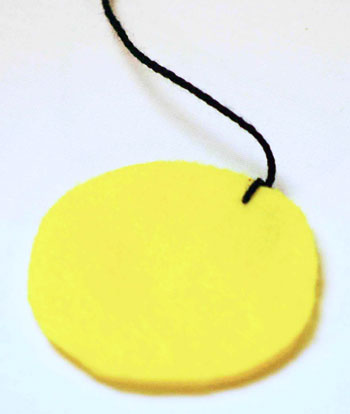
These instructions use felt. It's fun and versatile for lots of projects.
The blanket stitch adds a beautiful edge to sewn felt designs.
This project shows how to sew a blanket stitch by sewing two round pieces of felt together with a small amount of stuffing added.
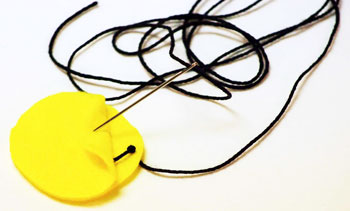
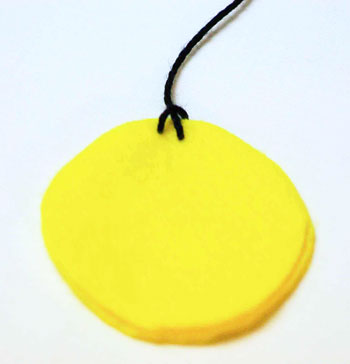
Begin with a threaded needle which has a knot tied in one end of the thread (or yarn in this case).
The blanket stitches are sewn from the front of the design.
The first stitch hides the knot.
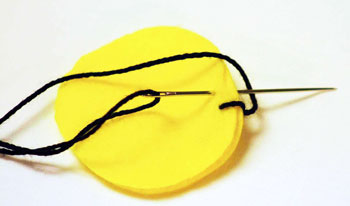
From between the two pieces of felt, push the needle through the back piece of felt.
Pull the thread until the knot catches on the felt.
The stitches are sewn roughly 1/8 inch from the outer edge.
These instructions use felt. It's fun and versatile for lots of projects.
The blanket stitch adds a beautiful edge to sewn felt designs.
This project shows how to sew a blanket stitch by sewing two round pieces of felt together with a small amount of stuffing added.
Begin with a threaded needle which has a knot tied in one end of the thread (or yarn in this case).
The blanket stitches are sewn from the front of the design.
The first stitch hides the knot.
From between the two pieces of felt, push the needle through the back piece of felt.
Pull the thread until the knot catches on the felt.
The stitches are sewn roughly 1/8 inch from the outer edge.
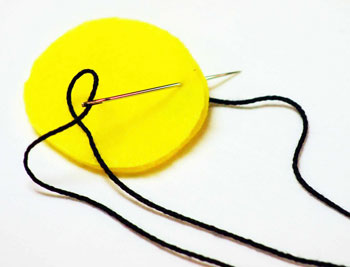
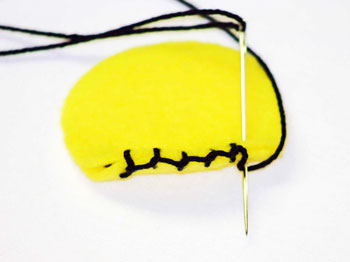
For the next stitch, position the two pieces of felt together.
From the top of the design, push the needle through both pieces of felt at the same distance from the edge as the first stitch.
The stitch should be roughly that same distance to the left of where the first stitch came out the back.
From the top of the design, push the needle through both pieces of felt at the same distance from the edge as the first stitch.
The stitch should be roughly that same distance to the left of where the first stitch came out the back.
This is the back view showing the needle coming through both pieces of felt.
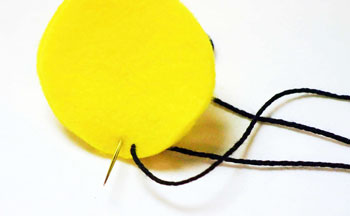
While the needle is still in the felt and with the top of the design facing up, wrap the yarn from right to left UNDER the needle.
(These instructions for how to blanket stitch are for a right-handed person. If you are left-handed, reverse the direction of the instructions.)
(These instructions for how to blanket stitch are for a right-handed person. If you are left-handed, reverse the direction of the instructions.)
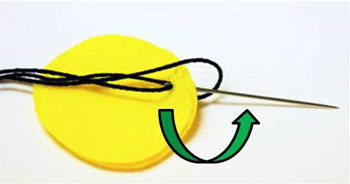
Pull the thread taut but not so tight that the felt is pinched or the thread pulls.
This view shows the first full stitch from the top or the visible front of the design.
This view shows the first full stitch from the top or the visible front of the design.
The back view shows how the thread wraps and how it begins to develop the blanket edge of the stitch.
The first stitch will not be fully formed into the blanket edge until the circle is finished and the last stitch meets the first.
The first stitch will not be fully formed into the blanket edge until the circle is finished and the last stitch meets the first.
From the top, make the next stitch to the left of the previous, wrapping the thread from the right to the left under the needle. Evenly space your stitches.
Here, the stitches show the blanket edge as it is formed by wrapping the thread under the needle.
From the underside or back view, the first stitch to the right of the picture continues to look odd.
The other stitches consistently build the decorative blanket edge.
Note: After several stitches, the yarn will become twisted and difficult to pull.
When this happens, hold the needle up and untwist the yarn or thread.
If your project is small, hold the project up by the needle and thread and let it untwist the yarn naturally.
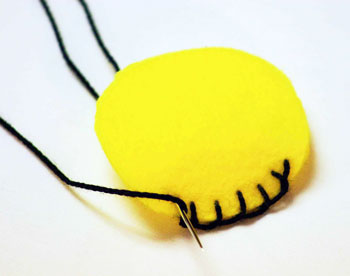
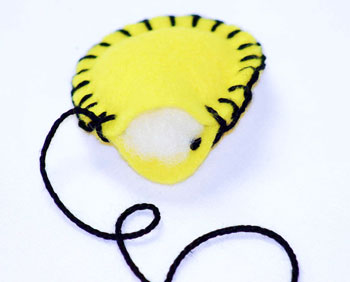
Repeat the stitches enclosing the space between the pieces of felt for the filling.
In our how to blanket stitch exercise, we add polyester fiberfill to form a three dimensional shape like you would for a stuffed toy or ornament.
While a small area remains open, stop to stuff the shape. Do not remove your needle and thread.
In our how to blanket stitch exercise, we add polyester fiberfill to form a three dimensional shape like you would for a stuffed toy or ornament.
While a small area remains open, stop to stuff the shape. Do not remove your needle and thread.
Add just enough filling to make a gently curved shape.
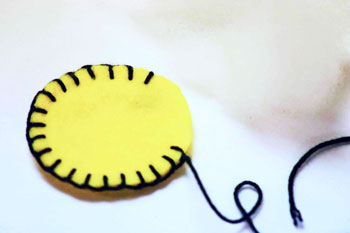
Holding the edges between your thumb and finger, continue the stitches until you are near the first stitch.
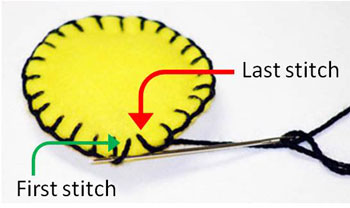
This is a back view of connecting the last stitch to the first.
Put your needle under that first stitch to join the blanket edge.
Normally, the needle making the last stitch from the top should go through the felt in the same hole as the first hidden knot stitch.
Here, for illustration the stitch is slightly to the right.
Put your needle under that first stitch to join the blanket edge.
Normally, the needle making the last stitch from the top should go through the felt in the same hole as the first hidden knot stitch.
Here, for illustration the stitch is slightly to the right.
This back view shows the thread going under that first stitch.
Make another loop in the thread by putting your needle through the edge again.
While the loop is still open, pass your needle through the loop.
This will make a knot in the thread.
While the loop is still open, pass your needle through the loop.
This will make a knot in the thread.
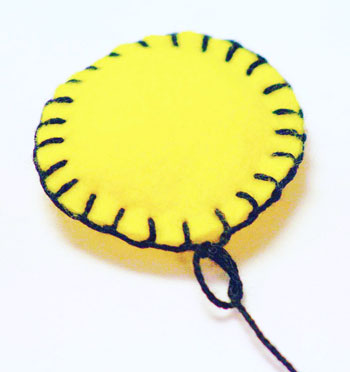
Pull the thread such that the knot stays close to the stitching.
Use your fingers to help the knot stay near the edge.
Use your fingers to help the knot stay near the edge.
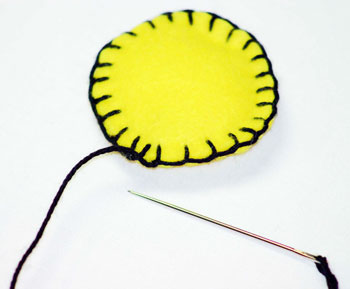
The thread should not be cut outside the edge.
Instead, near the knot, push the needle between the pieces of felt and through the stuffing to come out in the middle of the piece of felt.
Instead, near the knot, push the needle between the pieces of felt and through the stuffing to come out in the middle of the piece of felt.
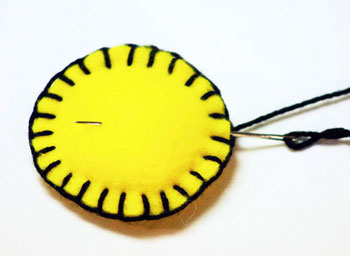
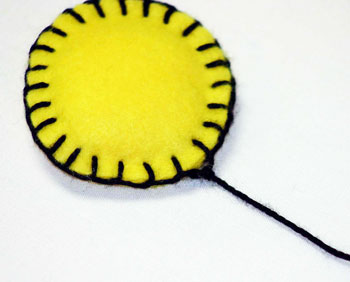
Pull the thread through the shape until it is snug.
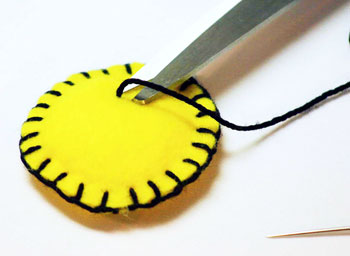
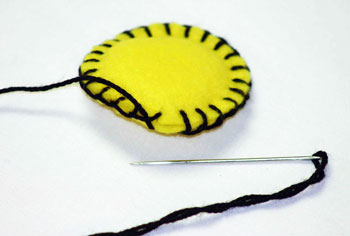
Trim the thread at the felt being careful not to cut the felt as you cut the thread.
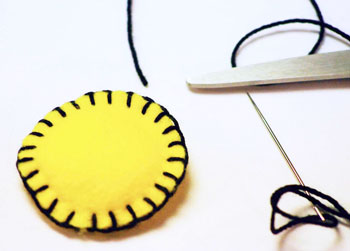
That's it for how to blanket stitch! See, that's easy.
And, it's especially easy when you use felt. You don't have to worry about fraying edges or about a right and wrong side of the fabric.
You can enjoy making many fun and easy projects with these simple how to blanket stitch instructions.
Visit our how to sew a blanket stitch overlay design for more instructions or sign up for our randomly produced newsletter to receive a link to the free How to Sew Stitches e-book..


funEZcrafts
Welcome
Come on in and stay awhile...

funEZcrafts
Welcome
Come on in and stay awhile...
Learn how to blanket stitch and have fun making lots of different projects.