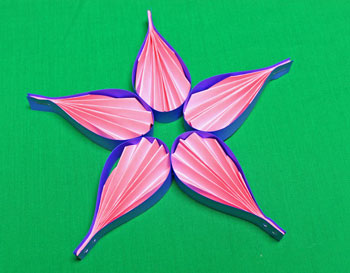
Easy Paper Crafts: Pleated Five-Point Star
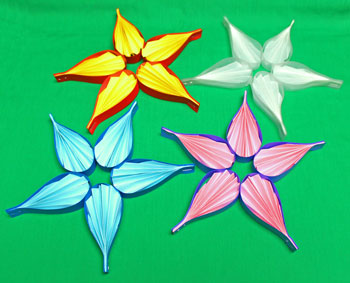
Paper, scissors, and staples turn into an interesting Pleated Five-Point Star to be used as decorations any time of the year.
Mix and match colors for several fun and easy stars.
Mix and match colors for several fun and easy stars.
Take a look at the simple steps below for how to make this fun ornament.
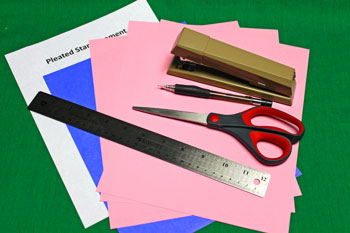
Easy Paper Crafts: Pleated Five-Point Star Materials and Tools:
Paper, 20 or 24-pound
Cardstock
Scissors
Ruler
Pencil
Stapler with staples
Pleated Five-Point Star pattern (click to open an Adobe PDF)
Cardstock
Scissors
Ruler
Pencil
Stapler with staples
Pleated Five-Point Star pattern (click to open an Adobe PDF)
The Steps for How to Make the Easy Paper Crafts: Pleated Five-Point Star:
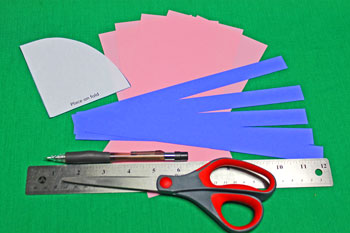
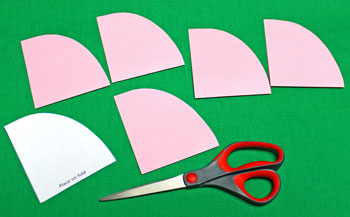
Print the Pleated Five-Point Star Pattern.
Cut around the outer edge of the printed shape.
Measure and cut five pieces of cardstock. Each piece is 3/4 (.75) inch wide and 10 inches long.
Measure and cut five pieces of regular paper (20 or 24-pound) 3.75 inches by 8.5 inches each.
Cut around the outer edge of the printed shape.
Measure and cut five pieces of cardstock. Each piece is 3/4 (.75) inch wide and 10 inches long.
Measure and cut five pieces of regular paper (20 or 24-pound) 3.75 inches by 8.5 inches each.
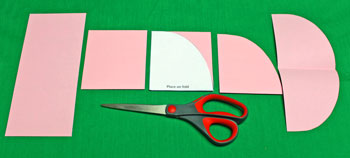
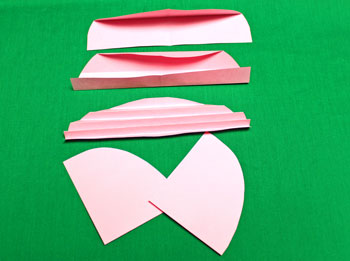
Fold the 3.75 x 8.5 paper shape in half.
Place the pattern with the long straight edge even with the fold.
Trim the folded shape following the curve of the pattern. Discard the trimmed corner.
Open the folded shape.
Place the pattern with the long straight edge even with the fold.
Trim the folded shape following the curve of the pattern. Discard the trimmed corner.
Open the folded shape.
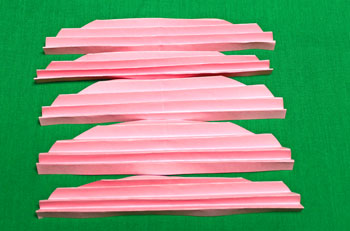
Fold and trim each of the five paper shapes.
Make accordion folds along the length of each paper shape.
Fold the rounded edge over to meet the straight edge. Use the previous halfway fold to help match the centers of the edges.
Next, fold the edges to meet the center fold matching centers.
Then fold the edges backwards to begin making the accordion folds.
Fold the rounded edge over to meet the straight edge. Use the previous halfway fold to help match the centers of the edges.
Next, fold the edges to meet the center fold matching centers.
Then fold the edges backwards to begin making the accordion folds.
Fold each of the paper shapes into accordion folds.
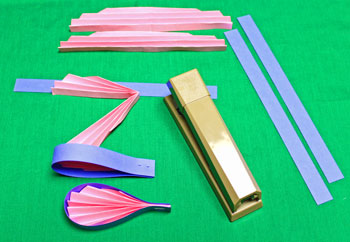
With the "mountain" folds facing up, fold the accordion shapes in half with the long edges in the center and the rounded edges on the outside.
Place one end of a strip of cardstock even with the fold of the paper.
Wrap the cardstock strip around the curve of the folded accordion until the end matches the fold.
The accordion fold is less than the 3/4 (.75) inch width of the cardstock. Center the paper within the width of the strip.
Hold the ends of the cardstock and the folded accordion shape together.
Staple through all layers with the staple horizontal with the strip.
Follow the same steps for the remaining points of the star.
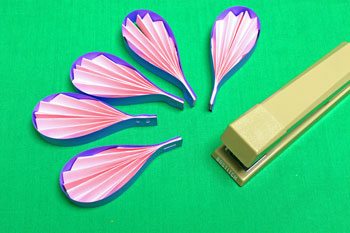
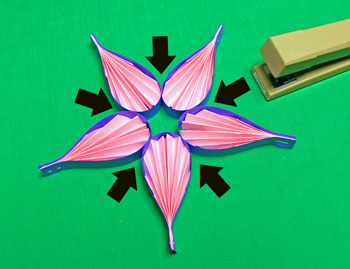
Position the shapes with the rounded ends toward the center and the stapled ends forming the points of the star.
Be sure to place the shapes such that their folds are all in the same direction. (One side has mountain folds, the other has valley folds.)
Be sure to place the shapes such that their folds are all in the same direction. (One side has mountain folds, the other has valley folds.)
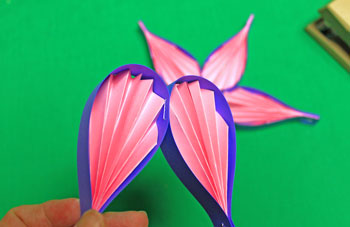
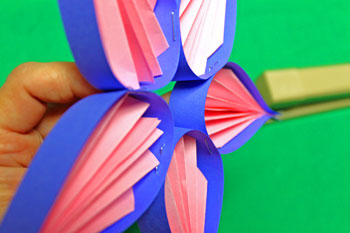
On the bottom side, place a staple where the two shapes' rounded edges met when positioned into a star shape.
Continue stapling the shapes together based on how they were positioned.
The Pleated Five-Point Star is finished and ready to display.
Colorful paper and a bit of time becomes an interesting decoration.
Heavier cardstock and paper makes a sturdy design that can easily be hung.
Lighter paper, such as the white vellum and tracing paper version above, makes an airy design but can only be displayed flat.
This would be pretty with a flameless candle placed on the middle of the shape.
Have fun with lots of colors and lots of combinations!
The Pleated Five-Point Star project adds a bit of fun any time of the year.

funEZcrafts
Welcome
Come on in and stay awhile...

funEZcrafts
Welcome
Come on in and stay awhile...
